A multimeter is a versatile device used to check the voltage in electrical circuits, as well as to determine whether a circuit is using alternate current (AC) or direct current (DC). You can use a multimeter to test the breakers in your circuit box and ensure that they are functioning as they should.
Step 1
Open the circuit box and determine which breaker you want to test. Each breaker powers a different portion of your house, and should be labeled to let you know which is which. (If they aren’t, this is a good time to label them properly.)
Step 2
Turn off all the lights and appliances being powered through the breaker you want to test.
Step 3
Put on a pair of rubber-soled shoes and make sure the area around the circuit box is dry. Watch for puddles on the ground in particular, and mop them up and let the ground dry before testing the breaker.
Step 4
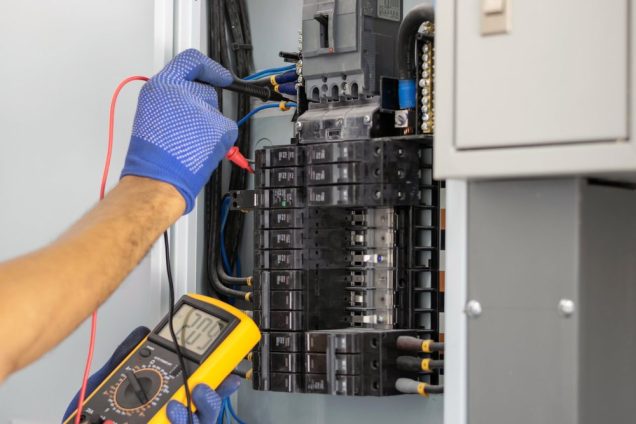
Unscrew the metal frame around the circuit breakers with a Screw-driver and set it aside. Behind it, you should see the wiring running through the circuit breakers as well as the breakers themselves.
Step 5
Set a multimeter to “Volts AC.” The wiring in most homes uses alternating current, and the Volts AC setting allows the multimeter to read it correctly. (DC is used to test the voltage in battery-powered electronics.)
Step 6
Touch one prong on the multimeter to the breaker’s terminal screw (or “hot screw”). Touch the other prong on the breaker to a ground screw, which is usually located in a metal bar along the right-hand side of the circuit box.
The readout on the multimeter should tell you how much electricity is flowing through the breaker. Ideally, it should read either 120 or 240 volts. If it doesn’t read anything, your breaker is faulty and should be replaced.
For more information or assistance during normal business hours, call or e-mail TPS at the phone number above. You can also complete and submit our Service Project Inquiry form.
