
What do you do if your room includes a sitting area in the middle? You would like a lamp or two, but you are 10 to 12 feet or more from any wall outlet. Long extension cords running along the floor can be an obvious tripping hazard.
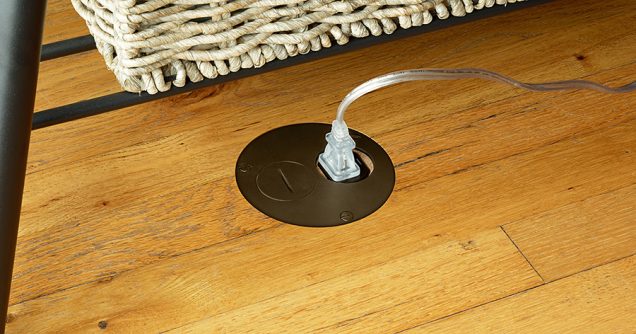
The answer is a floor outlet. Often known in the electrical trades as a poke-through or drop-in, a floor outlet has a specially designed mounting plate that fits virtually flush with the floor surface. The outlet receptacle itself is sometimes flush with the floor level, as well; or it can be recessed down below the surface of the floor, with a secondary cover plate that covers the receptacle opening when it is not in use.
When working with cables and electrical wires, it is vitally important to ensure no power is flowing. Shut off the power at the home’s electrical service panel, either by flipping the proper breaker or removing the appropriate fuse.
As with any electrical installation, a good understanding of electrical work is required if you are doing this work yourself.
- Create the opening to fit in the service panel, Use a hole saw sized according to the instructions that come with the kit.
- Wiring the box, run the wire from a source to the panel box on the floor. Make sure that the cable size is appropriate for the amperage of the circuit.
- Feed the cable into the bottom of the floor box or tube.
- Connect the wire to appropriate wires and the point of connection should be protected with clips to prevent hazards.
- Tighten the clamps to hold the wire in the box firmly, and insert the box in the hole in the ground.
- Secure the box on the floor, and use the cover to protect the box and the connection point.
For more information or assistance during normal business hours, call or e-mail TPS at the phone number above. You can also complete and submit our Service Project Inquiry form.
